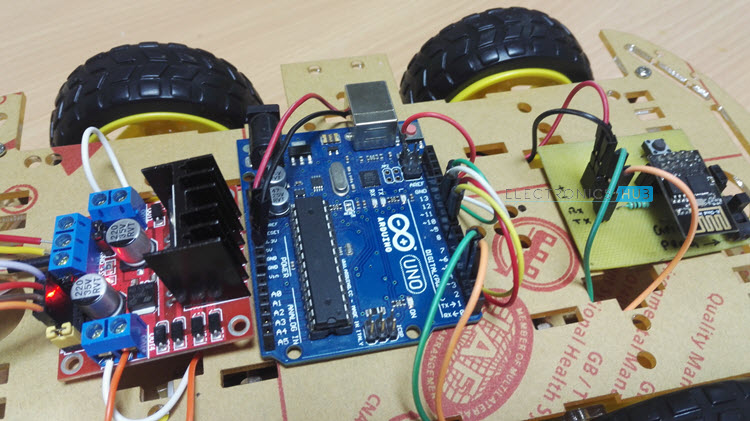
In the previous ESP8266 Projects, we have seen a few WiFi based projects like WiFi Controlled LED and WiFi Controlled Relay. Taking the same concept to a next level in this project, I will show you how to build and develop a WiFi Controlled Robot using ESP8266 and Arduino. When I say WiFi Controlled Robot, I mean a robotic car that is controlled over a WiFi Network.
Overview
If you are following ElectronicsHub for some time, you will remember that we have built a variety of robots like Line Follower Robot, Obstacle Avoiding Robot, Bluetooth Controlled Robotic Arm and RF Controlled Robot.
The first two robots i.e. Line follower Robot and Obstacle Avoiding Robot do not have any manual control of the robot i.e. there will be no additional inputs from the user apart from programming its main functionality.
But in case of the other two robots i.e. Bluetooth Controlled Robotic Arm and RF Controlled Robot, the robots wait for the user to provide appropriate input. This input can be either direction of movement or holding an object etc.
In this project, I have built a simple Robot (robotic car) that can be controlled over WiFi Network i.e. the user inputs for direction of the movement of the Robot are provided through the WiFi (with the help of a simple HTML Page).
Concept behind WiFi Controlled Robot
If you have followed our “WiFi Controlled LED using ESP8266 and Arduino” project, then you can easily understand the concept of the WiFi Controlled Robot.
The ESP8266 Module is responsible for connecting to the WiFi Network and also acting as a server. Coming to the client, a simple HTML page is created and the browser which opens this web page acts as a client.
When ever you click on the web page, corresponding information will be transmitted to the Server (ESP8266). This information is further received by Arduino and it controls the motors of the robot.
Circuit Diagram of WiFi Controlled Robot
The circuit diagram of the WiFi Controlled Robot using ESP8266 and Arduino is given in the image below.
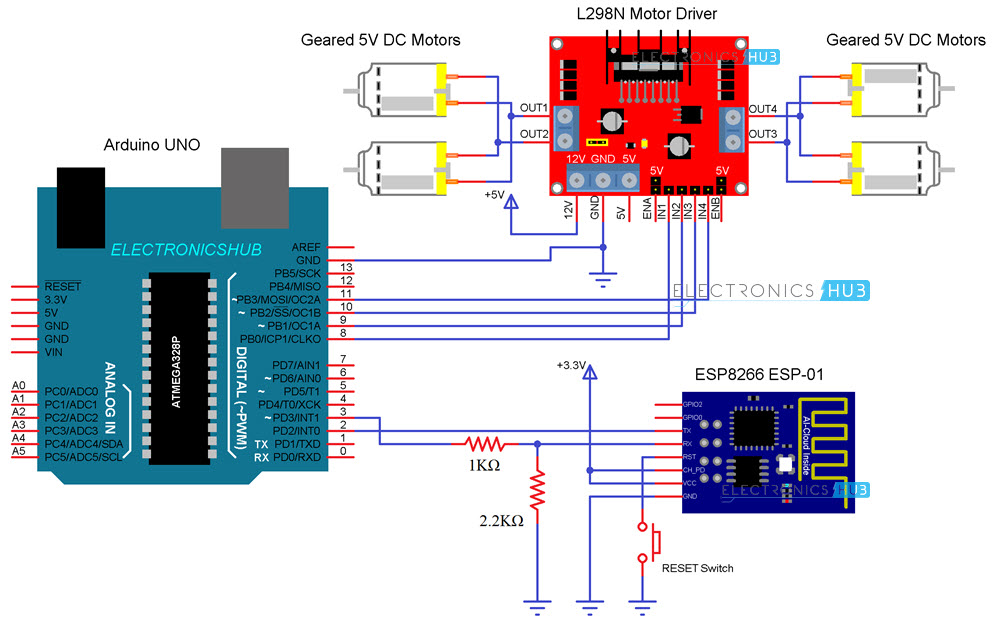
NOTE: ESP8266 WiFi Module is loaded with AT Commands. The above circuit is designed keeping that in mind.
Components Required
- ESP8266
- L298N Motor Driver Module
- Arduino UNO
- Robot Chassis
- 4 x 5V Geared Motors
- Connecting Wires
- Power supply (or battery)
Circuit Design
The first important thing to remember is that I will be programming the Arduino and it is responsible for configuring the ESP8266 Module through Serial Communication and also controlling the L298N Motor Driver Module.
So, the Digital Pins 2 and 3 of Arduino are configured as RX and TX using SoftwareSerial function. These pins are connected to the TX and RX pins of the ESP8266 Module.
Then, the Inputs of the L298N Motor Driver Module i.e. IN1, IN2, IN3 and IN4 are connected to Digital Pins 8, 9, 10 and 11 of Arduino UNO.
Coming to the robot chassis, it has 4 geared motors. So, I have connected the right two motors in parallel and connected them to OUT1 and OUT2 terminals of the Motor Driver. Similarly, the left two motors to OUT3 and OUT4.
Code
There are two codes for the WiFi Controlled Robot project. One code is for the Arduino UNO and the other is an HTML Code for creating a Web Page.
Arduino Code
Following is the Arduino Code for the project. In this code, enter the SSID and Password of your WiFi network at appropriate places.
Also, there is a section in the code which is responsible for assigning a static IP Address to the ESP8266 Module. This IP Address (along with the default Gateway and Subnet Mask) must be changed as per your requirement.
It is very important that the Static IP Address you will be assigning should not be in conflict with any other device in your network i.e. no other device should possess the same IP Address.
So, scan for all the IP Addresses in your network and carefully assign the IP Address.
HTML Code
In order to create a control web page, you can use the following HTML Code along with a JavaScript file.
Download the above code with .html extension and also download the jQuery.js file. Place both these files in a single folder.
Working
A simple project called WiFi Controlled Robot using ESP8266 and Arduino is implemented here. Let me explain its working.
Upload the Arduino code after making the necessary connections and changes to the code. If you open the serial monitor of the Arduino IDE, you can see the AT Commands that being sent to the ESP8266 Module.
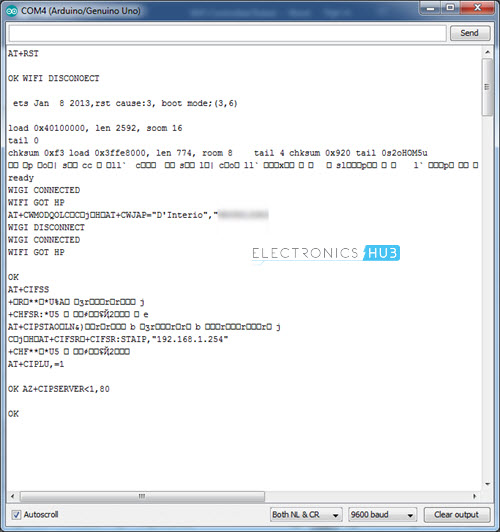
After the ESP Module is connected to WiFi, it will assign the static IP and also creates the server. Once the server is created, the ESP Module is waiting for connecting with a client.
Now, if you open the HTML Page which you have downloaded earlier, you can a simple layout that consists of five buttons with names FORWARD, REVERSE, RIGHT, LEFT and STOP.
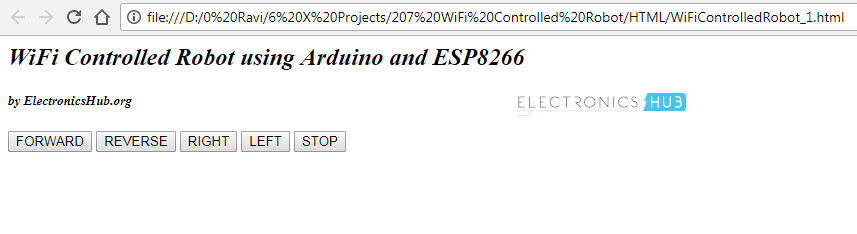
By looking at these buttons, you might have understood what each button does. Simply clicking the button performs that particular action. It is as simple as that.
NOTE:
- This WiFi Controlled Robot is controlled with the help of an HTML Web Page (which can be accessed using any web browser on a computer that is connected to the same WiFi Network as ESP8266).
- There are many projects out there which have implemented a similar concept but using Apps like Blynk.
- The reason for which I have not gone with that App is that I felt that you really do not know what is going on actually as everything is done by the library files.
- So, if you want to know exactly what is going on with the project, then only you should try this. If not, you can simply implement the project using the Blynk App.
- If you go through both the codes carefully, you can understand how the communication happens between the Browser and the ESP Module.
Conclusion and Applications
- A simple WiFi Controlled Robot is implemented in this project where a robotic car is controlled using a web page over WiFi Network.
- You can make this project with advanced features like integrating a camera and accessing the feed live on the browser.
The post WiFi Controlled Robot using ESP8266 and Arduino appeared first on Electronics Hub.


No comments:
Post a Comment