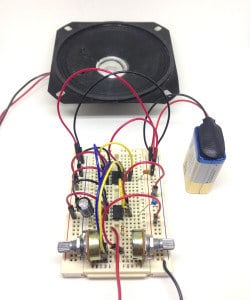
Do you want a fun and easy-to-build circuit? Here’s the simple, but fun Atari Punk Console – with schematics and parts list. It’s a quick build, so you can easily build it during an evening.
It takes its name from the old Atari computers of the 80s because it makes similar sounds.
And after my (not-so-intense) research (I basically just read about it on Wikipedia), I’ve come to learn that the circuit was first published in a Radioshack magazine in 1980.
Here’s a short clip of me playing with the circuit I built:
This was the first really cool sound-creating circuit I ever built.
Before building this I had only built simple tone-generators. So the first time I hooked this baby up, I was playing with it for an hour – making everyone else in the makerspace crazy.
This circuit is perfect if you have built a couple of simple circuits before and want more interesting stuff.
Or if you’re just looking for something really cool to build.
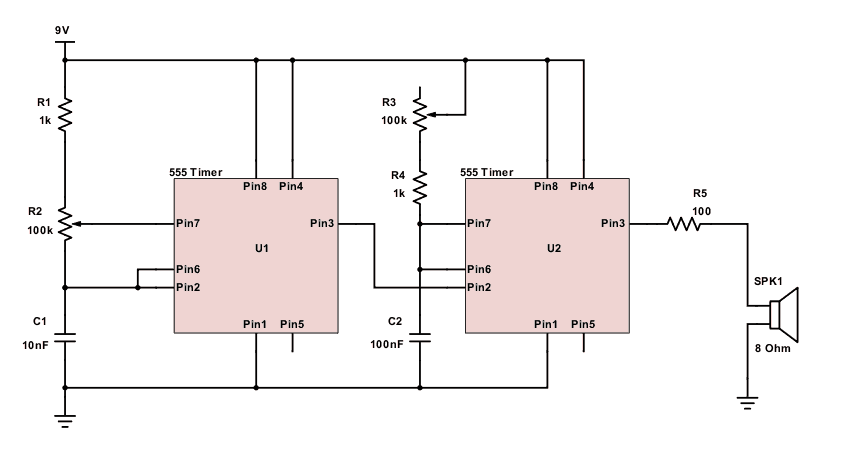
Atari Punk Console Circuit Diagram
Parts List
To build the Atari Punk Console, you need:
- A breadboard board to build it on
- Jumper wires
- Speaker
- 100 Ω resistor
- 10 nF capacitor
- 100 nF capacitor
- Two 555 timer chips
- Two 100k potentiometers
- Two 1 kΩ resistors
These are all standard components and pretty easy to get your hands on. Not sure where to get components? Check out my list of where to buy components and tools.
Description
This is a refreshing alternative to the theoretical circuits you see in many books.
The circuit uses two 555-timers.
The 555 Timer needs a few capacitors and resistors to set the tone or the pulse length.
By combining one that sets the frequency and one that sets the pulse length, you can create some crazy sounds.
Atari Punk Console Kit
You can easily find all the components yourself and build it on a breadboard like described above. But if you prefer an even more convenient way – you could get yourself an Atari Punk Console kit.
The advantage of the kit is that you get everything you need in one go. And it also has a nice casing to fit the circuit into.
Have you tried building this circuit? How did it go?
Let me know in the comments below!
Copyright Build Electronic Circuits


No comments:
Post a Comment