 We made progress on our robot this week! Check out the video at the end of this post.
This is what happened:
During this week I figured out that our H-bridge design did not work as intended.
The problem was the TIP12x transistors. They have a huge voltage drop from collector to emitter of 2V. With two of them in the H-bridge design, there was only 1V left for the motor.
I thought the problem was the design. That we needed to increase the current or something to reduce the voltage, but I was unable to do it.
I did some Googling around and came across this article/rant: Stop using antique parts!
Basically, it says that the TIP transistors are antiques that you shouldn’t use anymore exactly because of this huge voltage drop.
I started looking for other transistors, but then I came across this H-bridge module. I discussed it with Eduardo and we decided to buy it instead of using another week attempting to build one.
After all – we’re in week 3 and we don’t have a lot of time.
I bought a couple of samples, tested them, and they worked perfectly.
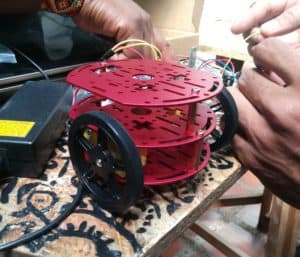
When we met up again on Saturday, we were ready to move on.
We connected the H-bridge module and created test-code for Arduino. We had some problems at first, but it turned out we had a few defective breadboard wires.
We replaced the wires and the motors moved, just like we wanted to!
Testing Bluetooth communication
Next up was the Bluetooth.
We created a simple mobile app with four buttons using MIT App Inventor. The app connects to the Bluetooth module and sends a letter to it, depending on which button was clicked:
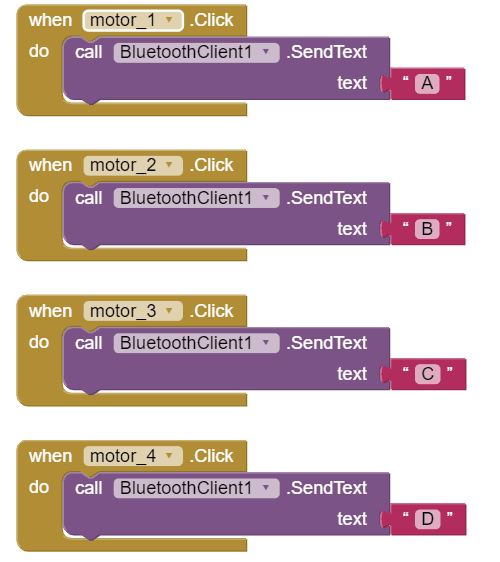
Click to download our App Inventor file
Below is the Arduino code we used to test the Bluetooth communication.
It just waits for something to arrive on the Serial port. When one of the following characters arrives, it turns one motor on in one direction: “A”, “B”, “C” or “D”.
#define A_IA  5
#define A_IB  6
#define B_IA  9
#define B_IB  10

char valor;

void setup() {

  // Setup serial communication
  Serial.begin(9600);

  // Set as output pins
  pinMode(A_IA, OUTPUT);
  pinMode(A_IB, OUTPUT);
  pinMode(B_IA, OUTPUT);
  pinMode(B_IB, OUTPUT);

  // Stop all motors
  digitalWrite(A_IA, HIGH);
  digitalWrite(A_IB, HIGH);
  digitalWrite(B_IA, HIGH);
  digitalWrite(B_IB, HIGH);
  delay(500);
}

void loop() {

  // Check if something is available on the serial port
  if (Serial.available()){

    //Read data from the Bluetooth module
    valor = Serial.read();

    // Motor A forward
    if (valor == 'A'){
      digitalWrite(A_IA, LOW);
      digitalWrite(A_IB, HIGH);
      digitalWrite(B_IA, HIGH);
      digitalWrite(B_IB, HIGH);
    }

    // Motor A backward
    if (valor == 'B'){
      digitalWrite(A_IA, HIGH);
      digitalWrite(A_IB, LOW);
      digitalWrite(B_IA, HIGH);
      digitalWrite(B_IB, HIGH);
    }

    // Motor B forward
    if (valor == 'C'){
      digitalWrite(A_IA, HIGH);
      digitalWrite(A_IB, HIGH);
      digitalWrite(B_IA, LOW);
      digitalWrite(B_IB, HIGH);
    }

    // Motor B backward
    if (valor == 'D'){
      digitalWrite(A_IA, HIGH);
      digitalWrite(A_IB, HIGH);
      digitalWrite(B_IA, HIGH);
      digitalWrite(B_IB, LOW);
    }

  }
}
Testing the robot
Check out the video below for our first test of the robot, using the app to control it. Unfortunately, we forgot to add a stop button!
What’s next?
The robot moves! That’s a great step forward.
Next week we’ll continue to develop the code for the robot to move properly. (Right now it just spins.)
Go back to the overview of Club de Arduino
Copyright Build Electronic Circuits


No comments:
Post a Comment