In the previous project, I have shown you how to connect ESP8266 to ThingSpeak. After that initial setup, you can proceed with integrating various sensors with ESP8266 and monitoring the data on ThingSpeak API. So, in this project, I’ll show you how to interface DHT11 Humidity Sensor with ESP8266 and ThingSpeak and monitor the data.
Overview
DHT11 is a low-cost Humidity and Temperature Sensor. Since it has both the temperature and humidity sensors, the DHT11 Sensor is sufficient to implement your first IoT Weather Monitoring System.
When it comes to IoT, the combination of ESP8266 and ThingSpeak is an excellent way for beginners and hobbyists to dive into your IoT related projects.
If you are planning to build your own weather station, then this project could be your first step in that path. In this project, I’ll talk about the DHT11 Sensor in brief and also explain how to interface the DHT11 Humidity and Temperature Sensor with ESP8266 and ThingSpeak.
A Brief Note on DHT11 Sensor
DHT11 and DHT22 are a pair of cheap but efficient Humidity Sensors which can measure Relative Humidity and Temperature. Out of these two, the DHT11 Sensor is a cheaper version with a fairly good range of both Humidity and Temperature.
The Relative Humidity range of DHT11 is 20-95% with an accuracy of +/- 5%. Coming to the Temperature, the range is 0-500C with an accuracy of +/- 20C.
DHT22 Sensor has a wider range for both Humidity and Temperature with more accurate results but is costlier and bulkier than DHT11.
Both these sensors use a single pin for communication using 1-Wire Bus between the Microcontroller and the Sensor. The output from this single data pin is digital and hence, you don’t need an Analog Input pins on the Microcontroller. This is very useful as the ESP8266 ESP-01 Module doesn’t have any Analog Input Pins.
Interfacing DHT11 Humidity Sensor with ESP8266 and ThingSpeak
I’ll interface the DHT11 Sensor with ESP8266 through one of the GPIO Pins. All the calculations regarding the Humidity and Temperature will be performed in the ESP8266 Module.
After measuring the Temperature and Humidity, the results will be posted on the ThingSpeak API and can be seen as a graph.
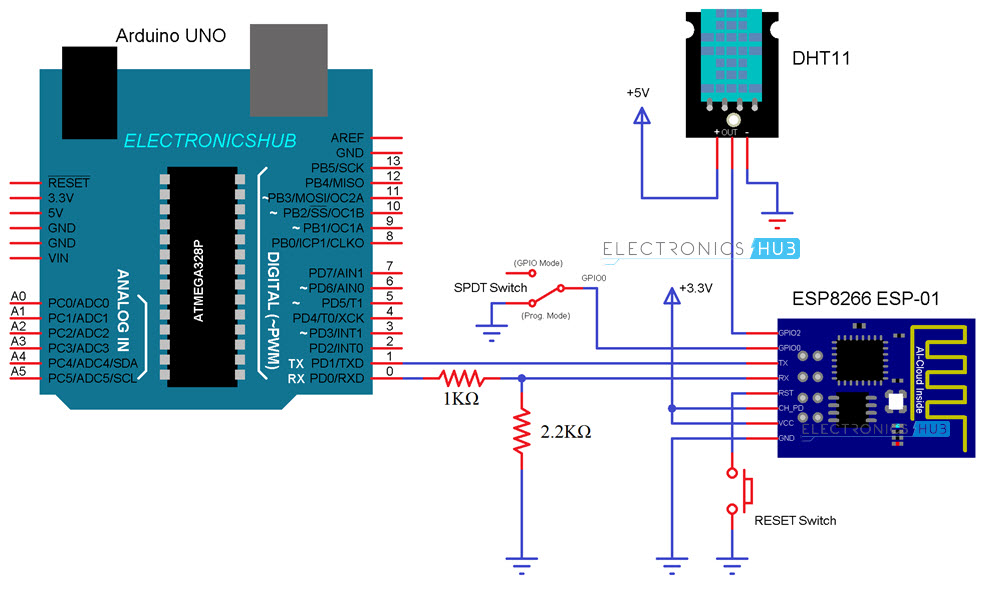
Circuit Diagram
The circuit diagram for Interfacing DHT11 Humidity Sensor with ESP8266 and ThingSpeak is shown in the image below.
Components Required
- Arduino
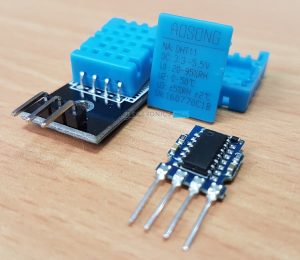
- DHT11 Humidity Sensor
- ESP8266
- Jumper Wires
- Mini Breadboard
- Resistors (1 KΩ and 2.2 KΩ)
- Push Button
- Slide Switch
Code
The code for connecting DHT11 Humidity Sensor with ESP8266 and ThingSpeak API is given below. You have to change the code i.e. add your WiFi Network’s SSID and Password at appropriate places.
Also, you need to note down your Write API Key from ThingSpeak Channel and paste it in the code.
In the previous project “CONNECT ESP8266 TO THINGSPEAK”, I have shown you how to create a channel in ThingSpeak and add fields for that channel. So, if you are unfamiliar with that information, please refer to that project.
NOTE:
- You have to download two libraries called “DHT” and “Adafruit_Sensor”. You can download these libraries from these links: DHT and Adafruit_Sensor.
- Download them in zip format, extract the contents and copy the folders to Documents–>Arduino–>libraries
Working
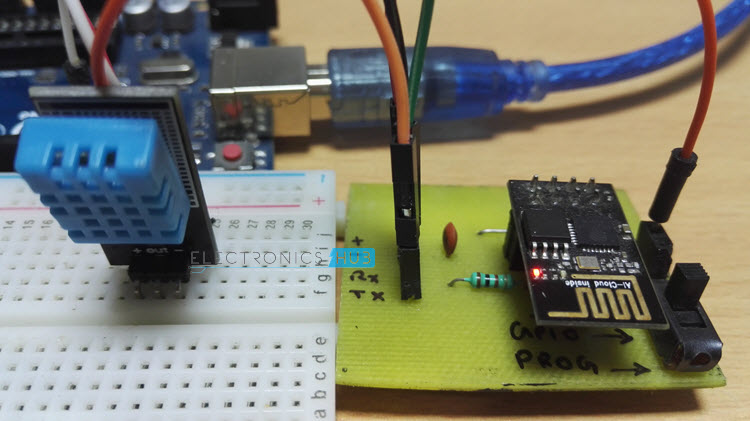
Make all the connections as per the circuit diagram. Here, I’ll be uploading the code directly to the ESP8266 Module. This means that the existing code or firmware will be erased.
Before uploading the code, connect the GPIO0 to GND and RESET the ESP Module to enable Programming Mode.
Also, select “Generic ESP8266 Module” in the Boards section of the Arduino IDE. Make sure that you have selected the correct COM PORT.
After uploading the code, first, disconnect the GPIO0 from GND (you can let is float) and RESET the ESP Module.
Now, if you open the Serial Monitor and set the baud rate to 115200 and also select “Both NL & CR” option, you can see the progress of the ESP8266 Module.
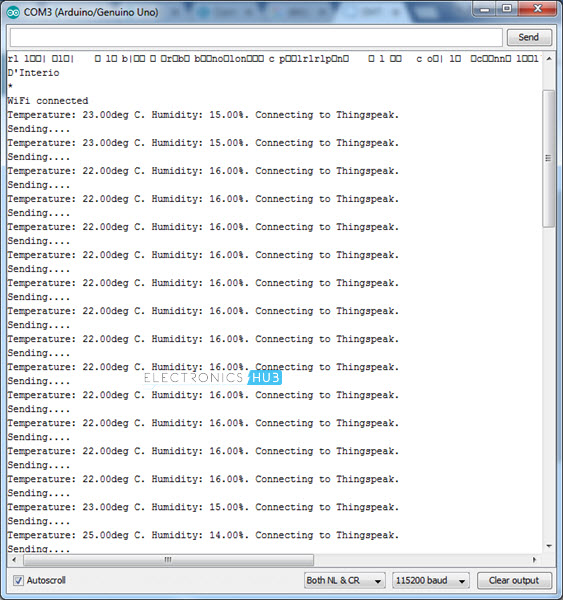
First, it will get connected to the WiFi Network. Then, immediately, it will try to read the data from the DHT11 Humidity sensor and calculate the Temperature and Humidity values based on that data.
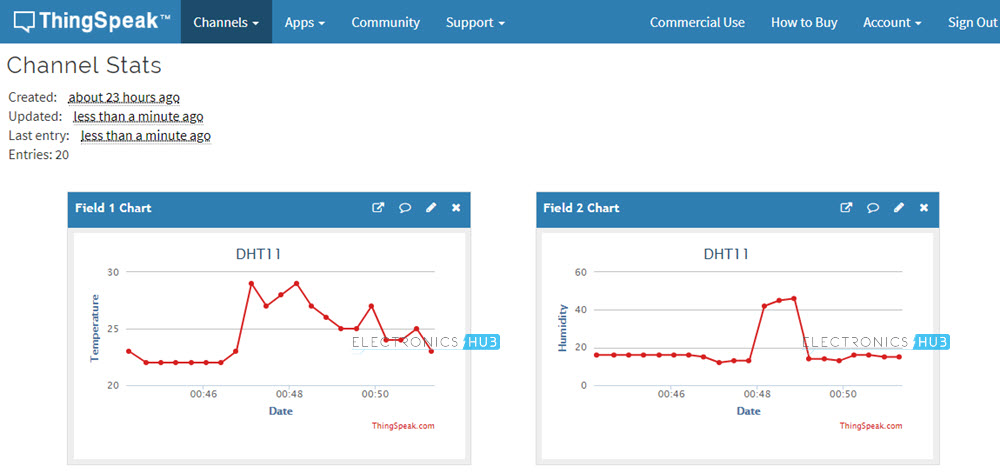
After this, the values of temperature and humidity will be uploaded to the ThingSpeak API. If you open your channel in the ThingSpeak, you can see the chart associated with the values from the DHT11 Sensor.
Conclusion and Applications
- In this simple project, I have shown you how to interface DHT11 Humidity Sensor with ESP8266 and ThingSpeak API.
- You can monitor the DHT11 Sensor Data from anywhere in the World just by sitting in front of a computer.
- This project could be your first implementation towards a bigger and better Weather Station with many other sensors.
The post DHT11 Humidity Sensor with ESP8266 and ThingSpeak appeared first on Electronics Hub.


Thank you for sharing technologically advanced sensors covered under Internet of Things. Iot is emerging day by day with new enhancements. Find more info here- https://store.ubibot.io/
ReplyDelete