In the previous project, I have shown you how to interface DHT11 Humidity Sensor with ESP8266 and post the information on ThingSpeak API. Continuing this ESP8266 – ThingSpeak Series, in this project, I will show you how to Interface DS18B20 Temperature Sensor with ESP8266 and ThingSpeak API.
Overview
Temperature Sensors are an integral part many systems like Automobiles, Computers, Air Conditioners, Printers, etc. They are also an important part of Home Security and Home Automation Systems.
Focusing on the Home Automation part, Temperature Sensors, like DS18B20, can be used in IoT Weather Stations, which is again a combination of different sensors. Upon implementing a Weather Station, you need to monitor the data in order to take necessary actions.
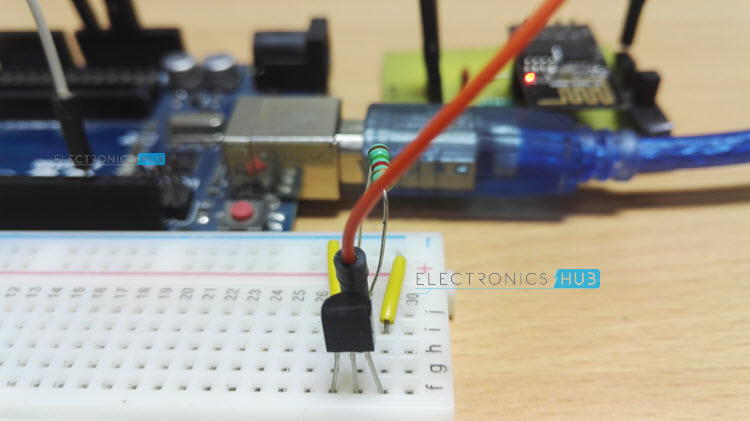
Here comes the combination of ESP8266 and ThingSpeak. Using ESP8266, you can connect your Weather Station to the Internet and using ThingSpeak API, you can monitor the data from the Weather Station remotely i.e. from any Web Browser.
Before implementing a complete IoT Weather Station, we will see how to Interface a DS18B20 Temperature Sensor with ESP8266 and ThingSpeak.
A Brief Note on DS18B20 Temperature Sensor
I have already shown you how to interface DS18B20 Temperature Sensor with both Arduino and Raspberry Pi. If you are interested in those projects, you can have a look: RASPBERRY PI DS18B20 TUTORIAL and ARDUINO DS18B20 INTERFACE TUTORIAL.
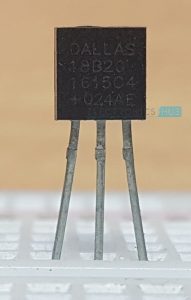
Coming to the sensor, DS18B20 is a Digital Thermometer which can measure temperatures in the range of -55 0C to +125 0C. The communication between the DS18B20 Sensor and the Microcontroller is through 1-Wire Communication (1-Wire Bus).
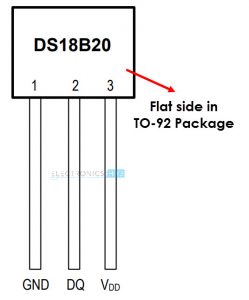
The most commonly used package of the DS18B20 Temperature Sensor is TO-92 Package and its Pin Diagram is shown below.
This sensor is frequently used in thermometers, thermostats, consumer electronics and industrial control systems.
Interfacing DS18B20 Temperature Sensor with ESP8266 and ThingSpeak
In this project, I’ll interface the DS18B20 Temperature Sensor with ESP8266 WiFi Module and after obtaining the data from the sensor, I’ll post Temperature information on the ThingSpeak API.
The ESP8266 Module is responsible for all the calculations and even posting the results to ThingSpeak.
Circuit Diagram
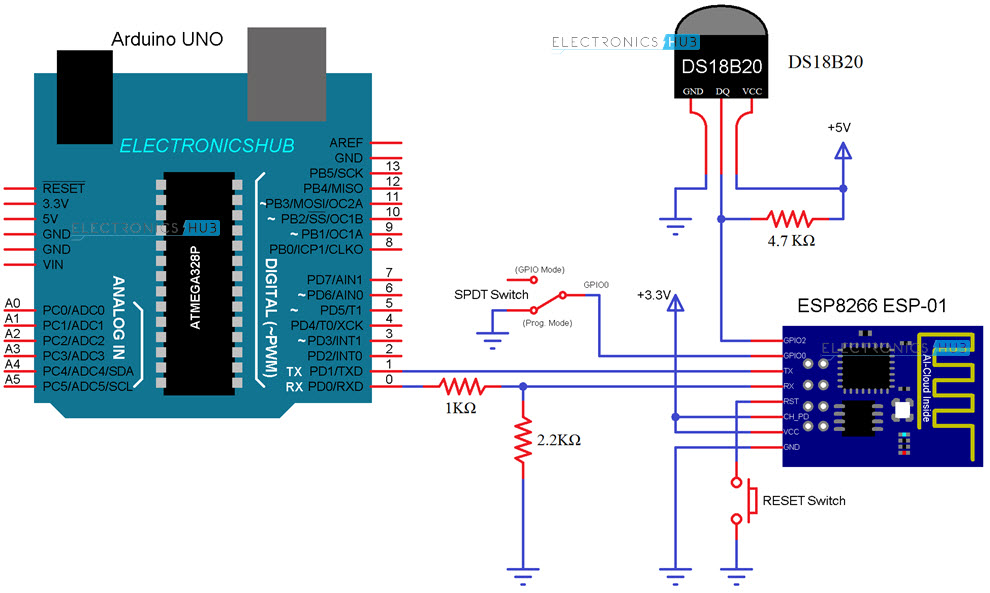
The image below shows the circuit diagram of Interfacing DS18B20 Temperature Sensor with ESP8266.
Components Required
- DS18B20 Temperature Sensor
- ESP8266 Module
- Arduino
- 4.7 KΩ Resistor (for pull-up)
- 1 KΩ and 2.2 KΩ Resistors (for level converter)
- Connecting Wires
- Mini Breadboard
- SPDT Switch
- Push Button
Circuit Design
All the connections with respect to Arduino, which is being used as an USB-to-Serial Converter and ESP8266 Module are already explained several times in the previous projects.
Coming to the DS18B20 Sensor, its data pin must be pulled high using a 4.7 KΩ Resistor. This data pin is connected to the GPIO2 of the ESP8266.
NOTE: I have connected a 1.5 KΩ Resistor as pull-up.
Code
Following is the code for interfacing DS18B20 Temperature Sensor with ESP8266. If you observe the code, it is very similar to the one written for Interfacing DHT11 Humidity Sensor with ESP8266.
Do not forget to change the SSID, Password and API Key as per your requirement. Also, make sure that you have downloaded the libraries OneWire and DallasTemperature.
Working
In this project, by Interfacing DS18B20 Temperature Sensor with ESP8266, I am extracting the temperature information from the sensor. Let me explain how this works.
After making all the connection as shown in the circuit diagram, configure the ESP8266 Module in Programming Mode (by connecting GPIO0 to GND and Resetting the Module). Now, you can upload the code to the ESP8266 Module using Arduino IDE.
NOTE: Select correct board and PORT in the Arduino IDE. Generic ESP8266 Module should be the Board.
Once the code is uploaded, configure the ESP8266 is normal mode by sliding GPIO0 from GND and resetting the module. Open the Serial Monitor in the Arduino IDE and select the baud rate as 115200. Also, do not forget to choose “Both NL & CR” option.
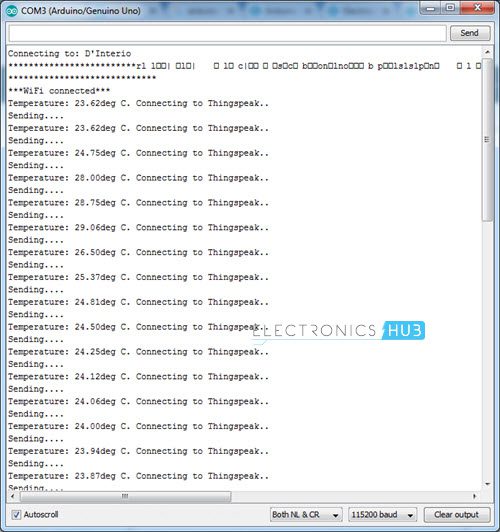
In the serial monitor, you can see the ESP8266 Module getting connected to the Internet through the WiFi Network.
After confirming the WiFi Connection, the ESP Module will start reading the Temperature information from the DS18B20 Sensor. This temperature information is displayed on the serial monitor.
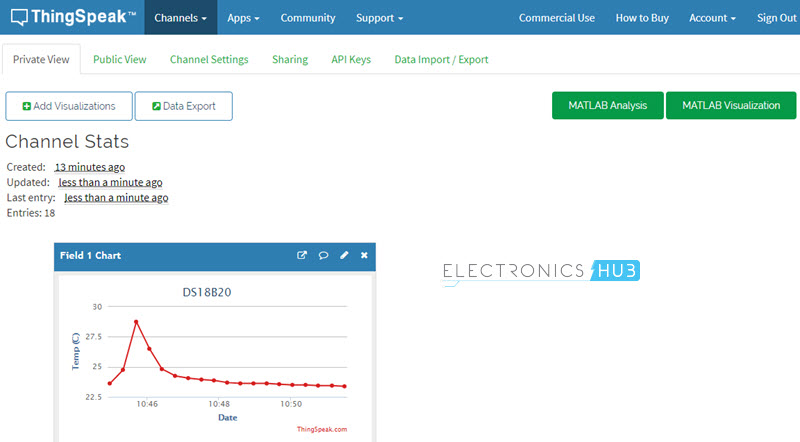
As we are also interested in monitoring the Temperature remotely, the temperature values will be uploaded to the ThingSpeak API on your channel.
In order to view the results, open your ThingSpeak Channel in any web browser and in the private view tab, you can see the Temperature values being updated.
Conclusion and Applications
- In the previous and this project, I have shown you interfacing two sensors i.e. DHT11 Humidity Sensor and DS18B20 Temperature Sensor with ESP8266.
- Also, the values (or results) from these sensors are posted in the ThingSpeak API for remote monitoring.
- These two sensors along with a few other sensors, can be implemented in a IoT based Weather Station Project.
The post DS18B20 Temperature Sensor with ESP8266 and ThingSpeak appeared first on Electronics Hub.
Hi,
ReplyDeleteYeah! With DS18B20 Temperature Sensor you can measure the temperature of the air, liquids like water and the temperature of the ground. Moreover, It is capable of reading temperatures within 0.05°C. One of my friend who is also working at https://store.ubibot.io/. I would like to share this post with him. Thanks.