In this tutorial, you’ll learn how to connect an Arduino sound sensor to control an LED with sound. By the end of this guide, you’ll have a working sound-activated LED!
Parts List
- Arduino
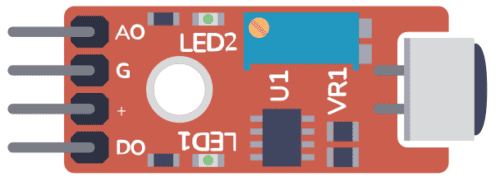
- Sound Sensor Module (for example VMA309)
- Light-Emitting Diode (LED)
- 220Ω Resistor (R1)
- Breadboard
- Jumper Wires
How To Connect the Arduino Sound Sensor
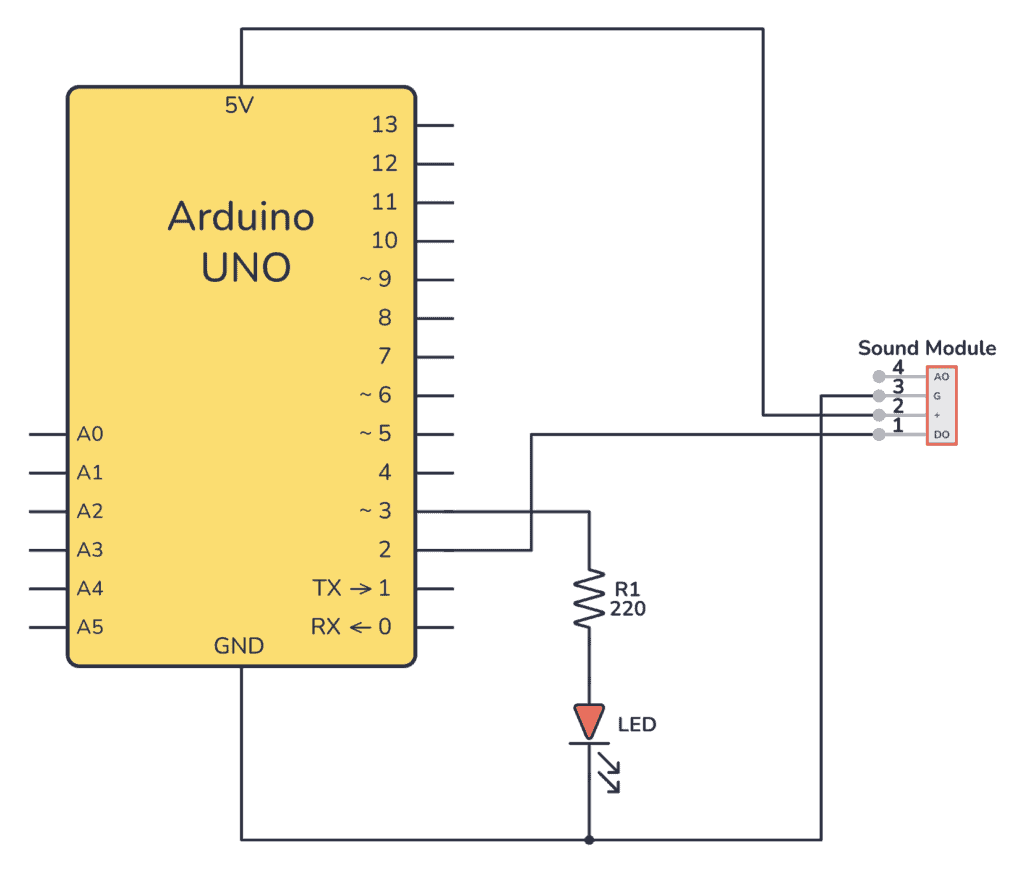
In the schematic diagram below, you can see the complete connections for this project.
Connect the sound sensor’s DO (Digital Output) pin to pin 2 on the Arduino. The AO (Analog Output) is not used in this example. The LED’s anode (longer leg) goes through a 220Ω resistor to pin 3 on the Arduino, and the cathode (shorter leg) goes to the GND (Ground).
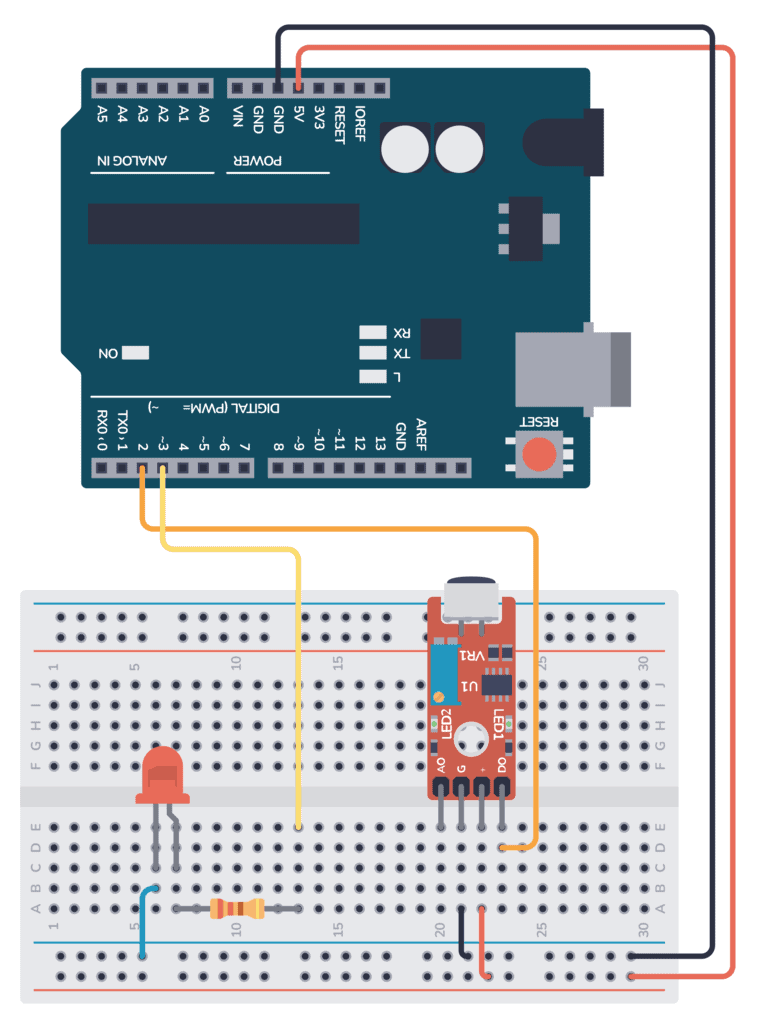
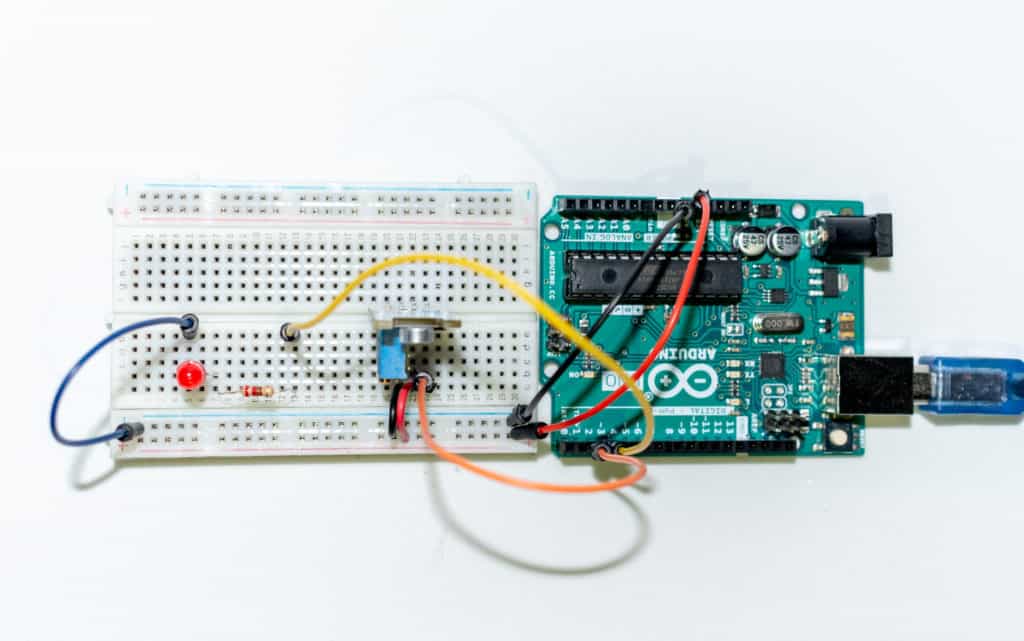
Breadboard Illustration
Check out the breadboard layout image below. It shows how to place the components on the breadboard and connect them with jumper wires. Ensure that the LED is oriented correctly with the longer leg connected through the resistor.
Arduino Sound Sensor Example Code
Upload the following code to your Arduino UNO:
// Define the pins used
int micPin = 2;
int ledPin = 3;

// Variables for holding the mic value and led state
int micValue;
int ledState

void setup()
{
  pinMode(micPin, INPUT); // Configures the sound sensor pin as input
  pinMode(ledPin, OUTPUT); // Configures the LED pin as output
}

void loop()
{
  // Read the sound sensor value
  micValue = digitalRead(micPin);

  // Check if the sound sensor has detected noise
  if (micValue == HIGH)
  {
    ledState = digitalRead(ledPin); // Retrieves the current LED state
    digitalWrite(ledPin, !ledState); // Toggles the LED state
    delay(500); // Pauses for 0.5 seconds
  }
}
Step-by-Step Instructions
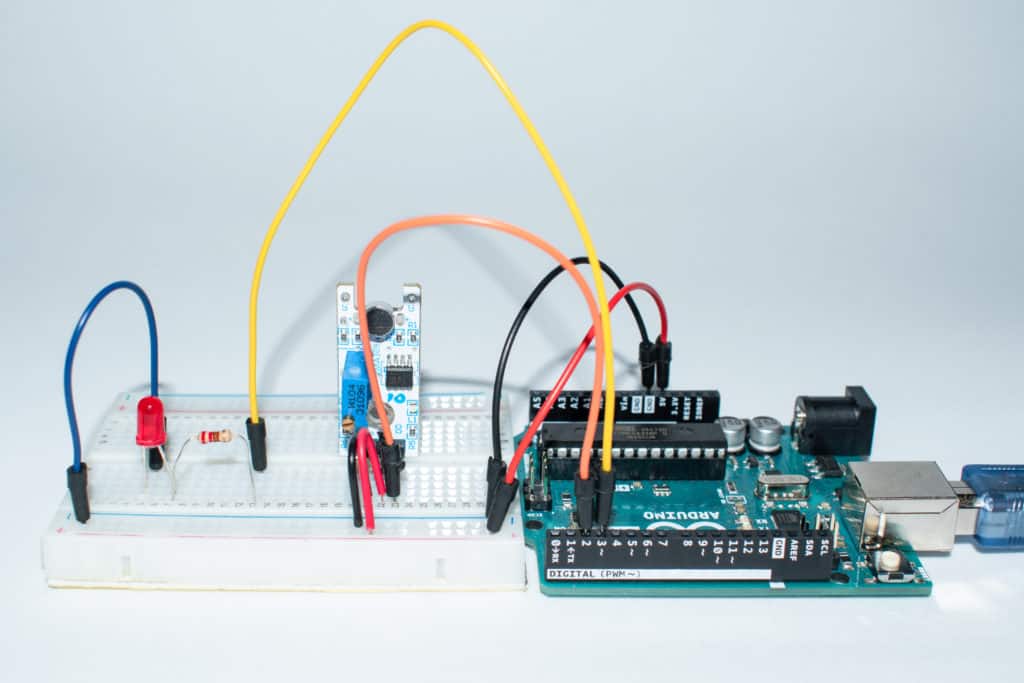
- Assemble your circuit as per the schematic and breadboard illustrations.
- Connect your Arduino UNO to your computer with the USB cable.
- Open the Arduino IDE and copy the example code into a new sketch.
- Select the correct board and port under the Tools menu.
- Upload the sketch to your Arduino UNO.
- Test the setup by making a noise near the sound sensor. The LED should toggle on and off with each detected sound.
Once you’ve uploaded the code to your Arduino, making a sound near the sensor should cause the LED to toggle. It will switch on if it was off, and off if it was on.
Common Issues and Solutions
If your Arduino Sound Sensor isn’t working, try this:
- LED not responding: Ensure the LED is correctly placed according to its polarity and that all connections are secure.
- No reaction to sound: Adjust the sensitivity of the sound sensor, if possible, or check the connections to pin 2.
Conclusion
You now have a sound-activated LED switch! If you have any questions, drop a comment below or reach out via the contact form.
Copyright Build Electronic Circuits


No comments:
Post a Comment